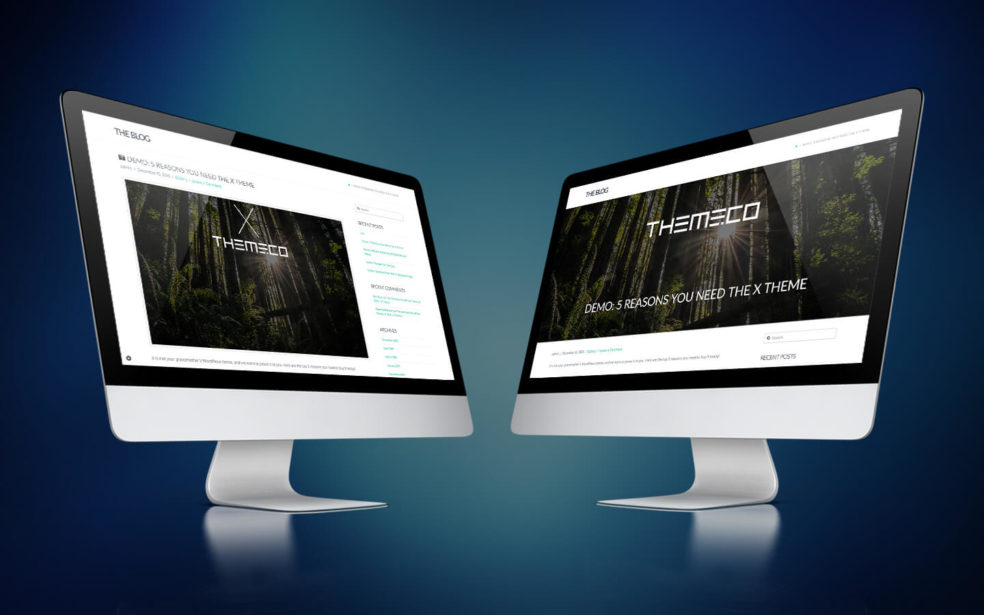
In April 2016 I wrote the original piece of code for the full width parallax featured image. It was a style that I began to see on a stack of blogs and fell in love with. The full width parallax featured image was trending in 2016 and it seems it has really blown up in 2017. Not only is it eye catching, the full width parallax featured image is functional and I’m going to show you exactly how to achieve this style on either the X Theme or Pro Theme by ThemeCo.
UPDATED – 17 Apr 2020
Over the past few weeks I have been working on improvements to the full width parallax featured image as requested by users within the X Theme Users Community facebook page. The latest improvements include:
- Support for both ThemeCo’s X Theme and the NEW Pro Theme
- More streamlined coding
- Better support of mobile devices
Hope you enjoy and keep the requests and feed back coming.
X Theme and Pro Theme sites using the Full Width Featured Image
Every day I smile at the emails, facebook messages, and comments that I receive regarding the full width parallax featured image. Supporters sharing links to their sites, asking questions about how they can add more function, even hiring me to recreate the parallax featured image around the styling of their sites.
I do try and check out all the links I am sent however some do slip through the cracks. If I have responded or made comment about how good your site looks, please feel free to contact me again. For everyone else, keep sending those links, I love to see my little contribution to the internet in action.
Below are 2 of my favourite adaptations of the full width parallax featured image:
Integral Life

The team at Integral Life hired me to not only implement the full width parallax featured image on the site, but also add a bit more function to it. In a lot of their posts there are multiple authors so we needed to create a way for multiple authors names to appear and link back to other posts written by those members. I achieved this with the assistance of the Co-Author Plus Plugin.
Other styling updates to the full width parallax featured image included:
- A transparent overlay
- Date the post was written
- And social sharing buttons
If this is something you may need implemented on your site, feel free to contact me.
Check out the styling here.
Will Pursell Photography
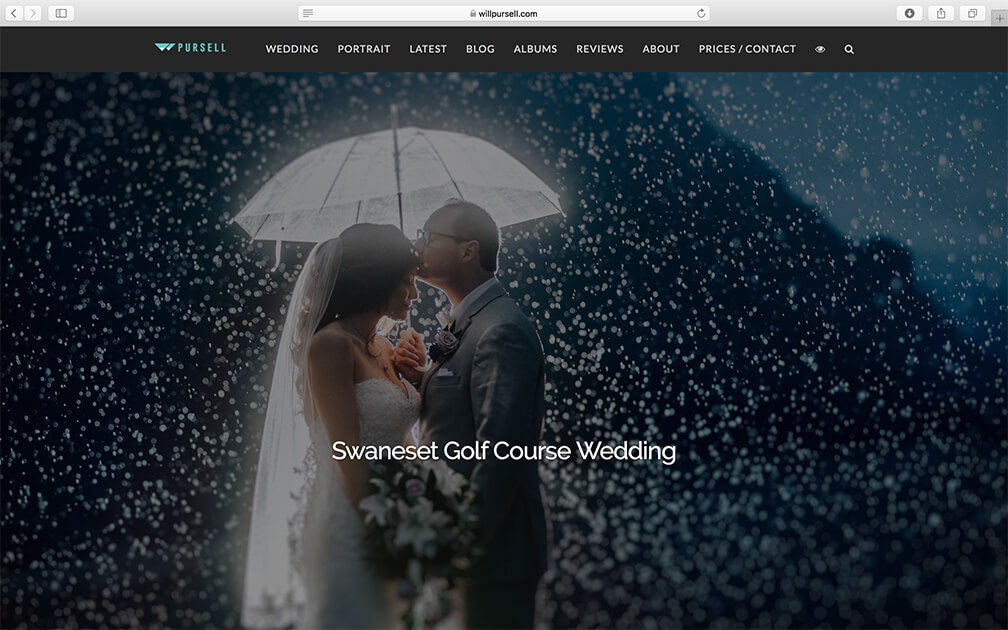
If you are reading this post from Canada, and about to get married, do yourself a favour and give Will Pursell a call. The gallery on his site is simply stunning but the full width parallax featured image on his blog pages really helps show off those images.
Will has taken the full width parallax featured image and made it a full screen, and I must say it looks simply stunning.
Check out the styling here.
WOW – How do I add the full width parallax featured image to my X Theme or Pro Theme site?
When I create a new piece of styling or functionality, I want it to be as simple as possible to implement. There is no use having something beautiful if no one gets to appreciate it. To make adding it as simple as possible, I have constructed 2 methods:
Method 1- A prebuilt child theme for either the X Theme or Pro Theme
I had a lot of visitors contact me who have never attempted any customisation within WordPress but wanted the Full Width Parallax Featured Image. A very common request. Lets face it, not everyone has experience in editing files within a FTP structure. You have your core business to focus on and you shouldn’t need to also learn to how to become a great web developer. Thats what you have me for 🙂
To help out as much as possible I have pre installed the parallax featured image in a child theme for both the X Theme and Pro Theme.
Follow the below steps to get your copy of both Child Themes.
Step 1
Click the below button and follow the instructions in the email I send you.
Step 2
Enjoy Parallax Featured Image function pre-installed in the child theme for both the X Theme and Pro Theme. And let me know if I can help in any way.
Method 2 – Make a coffee and lets get coding
Honestly, the full width parallax featured image shouldn’t take you any longer then what it took to make your cup of coffee. I’ve simplified the process to ensure your articles look amazing in no time.
Note: Make sure you use a child theme when adding any customisation to a wordpress site. Without a child theme you run the risk of losing all your customisations when the theme is updated. Don’t lose your hard work! For more information on why a child theme is so important check out Customizations – Best Practices on the ThemeCo Knowledge Base
Step 1
Make sure you are using a child theme
Step 2
Choose the stack your using from the below tabs
Integrity
Step 3
Create the file wp-single.php under /public_html/wp-content/themes/x-child/framework/views/integrity
Step 4
Insert the below code into the wp-single.php file you've just created.
<?php
// =============================================================================
// VIEWS/INTEGRITY/WP-SINGLE.PHP
// -----------------------------------------------------------------------------
// Single post output for Integrity.
// =============================================================================
$fullwidth = get_post_meta( get_the_ID(), '_x_post_layout', true );
?>
<?php get_header(); ?>
<?php global $post; ?>
<div class="benryan featured-image bg-image parallax" style="background-image:url(<?php the_post_thumbnail_url(null); ?>) !important;" data-x-element="section" data-x-params="{"type":"image","parallax":true}";">
<div class="x-container max width">
<div class="caption">
<h1 class="title h2"><?php the_title(); ?></h1>
<?php while ( have_posts() ) : the_post(); ?>
<?php x_integrity_entry_meta(); ?>
<?php endwhile; ?>
</div>
</div>
</div>
<div class="x-container max width offset">
<div class="<?php x_main_content_class(); ?>" role="main">
<?php while ( have_posts() ) : the_post(); ?>
<?php x_get_view( 'integrity', 'content', get_post_format() ); ?>
<?php x_get_view( 'global', '_comments-template' ); ?>
<?php endwhile; ?>
</div>
<?php if ( $fullwidth != 'on' ) : ?>
<?php get_sidebar(); ?>
<?php endif; ?>
</div>
<?php get_footer(); ?>
Step 5
Insert the following CSS into the Global CSS under Customise. To navigate here, go to Customise > Custom > Edit Global CSS
.entry-thumb {
  background-color:transparent;
}
.entry-featured {
  border:none;
}
.single-post .entry-featured {
display:none;
}
.single-post .entry-header .entry-title {
display:none;
}
.featured-image {
position: relative;
height: 500px;
background-size: cover;
background-attachment: fixed;
background-repeat: no-repeat;
background-position: center center;
}

@media (max-width: 736px) {
.featured-image {
background-attachment: initial;
background-position: center center;
}
.featured-image .caption{
bottom: 5% !important;
}
}

.featured-image:after {
content: "";
height: 100%;
width: 100%;
position: absolute;
display: block;
}

.featured-image:after {
bottom: 0;
background: rgba(96, 124, 138, 0.85);
}

.featured-image img {
width: 100% !important;
height: auto;
margin: auto;
}

.featured-image .caption {
position: absolute;
z-index: 999;
color: #fff !important;
bottom: 15%;
}

.featured-image .caption h1 {
color: rgba(255, 255, 255, 0.7) !important;
}

.entry-header .p-meta>span {
  display:none;
}
Integrity Pro
Step 3
Create the file wp-single.php under /public_html/wp-content/themes/pro-child/framework/views/integrity
Step 4
Insert the below code into the wp-single.php file you've just created.
<?php
// =============================================================================
// VIEWS/INTEGRITY/WP-SINGLE.PHP
// -----------------------------------------------------------------------------
// Single post output for Integrity.
// =============================================================================
$fullwidth = get_post_meta( get_the_ID(), '_x_post_layout', true );
?>
<?php get_header(); ?>
<?php global $post; ?>
<div class="benryan featured-image bg-image parallax" style="background-image:url(<?php the_post_thumbnail_url(null); ?>) !important;" data-x-element="section" data-x-params="{"type":"image","parallax":true}";">
<div class="x-container max width">
<div class="caption">
<h1 class="title h2"><?php the_title(); ?></h1>
<?php while ( have_posts() ) : the_post(); ?>
<?php x_integrity_entry_meta(); ?>
<?php endwhile; ?>
</div>
</div>
</div>
<div class="x-container max width offset">
<div class="<?php x_main_content_class(); ?>" role="main">
<?php while ( have_posts() ) : the_post(); ?>
<?php x_get_view( 'integrity', 'content', get_post_format() ); ?>
<?php x_get_view( 'global', '_comments-template' ); ?>
<?php endwhile; ?>
</div>
<?php if ( $fullwidth != 'on' ) : ?>
<?php get_sidebar(); ?>
<?php endif; ?>
</div>
<?php get_footer(); ?>
Step 5
Insert the following CSS into the Global CSS under Customise. To navigate here, go to Customise > Custom > Edit Global CSS
.entry-thumb {
  background-color:transparent;
}
.entry-featured {
  border:none;
}
.single-post .entry-featured {
display:none;
}
.single-post .entry-header .entry-title {
display:none;
}
.featured-image {
position: relative;
height: 500px;
background-size: cover;
background-attachment: fixed;
background-repeat: no-repeat;
background-position: center center;
}

@media (max-width: 736px) {
.featured-image {
background-attachment: initial;
background-position: center center;
}
.featured-image .caption{
bottom: 5% !important;
}
}

.featured-image:after {
content: "";
height: 100%;
width: 100%;
position: absolute;
display: block;
}

.featured-image:after {
bottom: 0;
background: rgba(96, 124, 138, 0.85);
}

.featured-image img {
width: 100% !important;
height: auto;
margin: auto;
}

.featured-image .caption {
position: absolute;
z-index: 999;
color: #fff !important;
bottom: 15%;
}

.featured-image .caption h1 {
color: rgba(255, 255, 255, 0.7) !important;
}

.entry-header .p-meta>span {
  display:none;
}
Renew
Step 3
Create the file wp-single.php under /public_html/wp-content/themes/x-child/framework/views/renew
Step 4
Insert the below code into the wp-single.php file you've just created.
<?php
// =============================================================================
// VIEWS/RENEW/WP-SINGLE.PHP
// -----------------------------------------------------------------------------
// Single post output for Renew.
// =============================================================================
$fullwidth = get_post_meta( get_the_ID(), '_x_post_layout', true );
?>
<?php get_header(); ?>
<?php global $post; ?>
<div class="benryan featured-image bg-image parallax" style="background-image:url(<?php the_post_thumbnail_url(null); ?>) !important;" data-x-element="section" data-x-params="{"type":"image","parallax":true}";">
<div class="x-container max width">
<div class="caption">
<h1 class="title h2"><?php the_title(); ?></h1>
<?php while ( have_posts() ) : the_post(); ?>
<?php x_renew_entry_meta(); ?>
<?php endwhile; ?>
</div>
</div>
</div>
<div class="x-container max width offset">
<div class="<?php x_main_content_class(); ?>" role="main">
<?php while ( have_posts() ) : the_post(); ?>
<?php x_get_view( 'renew', 'content', get_post_format() ); ?>
<?php x_get_view( 'global', '_comments-template' ); ?>
<?php endwhile; ?>
</div>
<?php if ( $fullwidth != 'on' ) : ?>
<?php get_sidebar(); ?>
<?php endif; ?>
</div>
<?php get_footer(); ?>
Step 5
Insert the following CSS into the Global CSS under Customise. To navigate here, go to Customise > Custom > Edit Global CSS
.entry-thumb {
  background-color:transparent;
}
.entry-featured {
  border:none;
}
.single-post .entry-featured {
display:none;
}
.single-post .entry-header .entry-title {
display:none;
}
.featured-image {
position: relative;
height: 500px;
background-size: cover;
background-attachment: fixed;
background-repeat: no-repeat;
background-position: center center;
}

@media (max-width: 736px) {
.featured-image {
background-attachment: initial;
background-position: center center;
}
.featured-image .caption{
bottom: 5% !important;
}
}

.featured-image:after {
content: "";
height: 100%;
width: 100%;
position: absolute;
display: block;
}

.featured-image:after {
bottom: 0;
background: rgba(96, 124, 138, 0.85);
}

.featured-image img {
width: 100% !important;
height: auto;
margin: auto;
}

.featured-image .caption {
position: absolute;
z-index: 999;
color: #fff !important;
bottom: 15%;
}

.featured-image .caption h1 {
color: rgba(255, 255, 255, 0.7) !important;
}

.entry-header .p-meta>span {
  display:none;
}
Renew Pro
Step 3
Create the file wp-single.php under /public_html/wp-content/themes/pro-child/framework/views/renew
Step 4
Insert the below code into the wp-single.php file you've just created.
<?php
// =============================================================================
// VIEWS/RENEW/WP-SINGLE.PHP
// -----------------------------------------------------------------------------
// Single post output for Renew.
// =============================================================================
$fullwidth = get_post_meta( get_the_ID(), '_x_post_layout', true );
?>
<?php get_header(); ?>
<?php global $post; ?>
<div class="benryan featured-image bg-image parallax" style="background-image:url(<?php the_post_thumbnail_url(null); ?>) !important;" data-x-element="section" data-x-params="{"type":"image","parallax":true}";">
<div class="x-container max width">
<div class="caption">
<h1 class="title h2"><?php the_title(); ?></h1>
<?php while ( have_posts() ) : the_post(); ?>
<?php x_renew_entry_meta(); ?>
<?php endwhile; ?>
</div>
</div>
</div>
<div class="x-container max width offset">
<div class="<?php x_main_content_class(); ?>" role="main">
<?php while ( have_posts() ) : the_post(); ?>
<?php x_get_view( 'renew', 'content', get_post_format() ); ?>
<?php x_get_view( 'global', '_comments-template' ); ?>
<?php endwhile; ?>
</div>
<?php if ( $fullwidth != 'on' ) : ?>
<?php get_sidebar(); ?>
<?php endif; ?>
</div>
<?php get_footer(); ?>
Step 5
Insert the following CSS into the Global CSS under Customise. To navigate here, go to Customise > Custom > Edit Global CSS
.entry-thumb {
  background-color:transparent;
}
.entry-featured {
  border:none;
}
.single-post .entry-featured {
display:none;
}
.single-post .entry-header .entry-title {
display:none;
}
.featured-image {
position: relative;
height: 500px;
background-size: cover;
background-attachment: fixed;
background-repeat: no-repeat;
background-position: center center;
}

@media (max-width: 736px) {
.featured-image {
background-attachment: initial;
background-position: center center;
}
.featured-image .caption{
bottom: 5% !important;
}
}

.featured-image:after {
content: "";
height: 100%;
width: 100%;
position: absolute;
display: block;
}

.featured-image:after {
bottom: 0;
background: rgba(96, 124, 138, 0.85);
}

.featured-image img {
width: 100% !important;
height: auto;
margin: auto;
}

.featured-image .caption {
position: absolute;
z-index: 999;
color: #fff !important;
bottom: 15%;
}

.featured-image .caption h1 {
color: rgba(255, 255, 255, 0.7) !important;
}

.entry-header .p-meta>span {
  display:none;
}
Ethos
Step 3
Create the file wp-single.php under /public_html/wp-content/themes/x-child/framework/views/ethos
Step 4
Insert the below code into the wp-single.php file you've just created.
<?php
// =============================================================================
// VIEWS/ETHOS/WP-SINGLE.PHP
// -----------------------------------------------------------------------------
// Single post output for Ethos.
// =============================================================================
$fullwidth = get_post_meta( get_the_ID(), '_x_post_layout', true );
?>
<?php get_header(); ?>
<?php global $post; ?>
<div class="benryan featured-image bg-image parallax" style="background-image:url(<?php the_post_thumbnail_url(null); ?>) !important;" data-x-element="section" data-x-params="{"type":"image","parallax":true}";">
<div class="x-container max width">
<div class="caption">
<h1 class="title h2"><?php the_title(); ?></h1>
<?php while ( have_posts() ) : the_post(); ?>
<?php x_ethos_entry_meta(); ?>
<?php endwhile; ?>
</div>
</div>
</div>
<div class="x-container max width main">
<div class="offset cf">
<div class="<?php x_main_content_class(); ?>" role="main">
<?php while ( have_posts() ) : the_post(); ?>
<?php x_get_view( 'ethos', 'content', get_post_format() ); ?>
<?php x_get_view( 'global', '_comments-template' ); ?>
<?php endwhile; ?>
</div>
<?php if ( $fullwidth != 'on' ) : ?>
<?php get_sidebar(); ?>
<?php endif; ?>
</div>
</div>
<?php get_footer(); ?>
Step 5
Insert the following CSS into the Global CSS under Customise. To navigate here, go to Customise > Custom > Edit Global CSS
.entry-thumb {
  background-color:transparent;
}
.entry-featured {
  border:none;
}
.single-post .entry-featured {
display:none;
}
.single-post .entry-header .entry-title {
display:none;
}
.featured-image {
position: relative;
height: 500px;
background-size: cover;
background-attachment: fixed;
background-repeat: no-repeat;
background-position: center center;
}

@media (max-width: 736px) {
.featured-image {
background-attachment: initial;
background-position: center center;
}
.featured-image .caption{
bottom: 5% !important;
}
}

.featured-image:after {
content: "";
height: 100%;
width: 100%;
position: absolute;
display: block;
}

.featured-image:after {
bottom: 0;
background: rgba(96, 124, 138, 0.85);
}

.featured-image img {
width: 100% !important;
height: auto;
margin: auto;
}

.featured-image .caption {
position: absolute;
z-index: 999;
color: #fff !important;
bottom: 15%;
}

.featured-image .caption h1 {
color: rgba(255, 255, 255, 0.7) !important;
}

.entry-header .p-meta>span {
  display:none;
}
Ethos Pro
Step 3
Create the file wp-single.php under /public_html/wp-content/themes/pro-child/framework/views/ethos
Step 4
Insert the below code into the wp-single.php file you've just created.
<?php
// =============================================================================
// VIEWS/ETHOS/WP-SINGLE.PHP
// -----------------------------------------------------------------------------
// Single post output for Ethos.
// =============================================================================
$fullwidth = get_post_meta( get_the_ID(), '_x_post_layout', true );
?>
<?php get_header(); ?>
<?php global $post; ?>
<div class="benryan featured-image bg-image parallax" style="background-image:url(<?php the_post_thumbnail_url(null); ?>) !important;" data-x-element="section" data-x-params="{"type":"image","parallax":true}";">
<div class="x-container max width">
<div class="caption">
<h1 class="title h2"><?php the_title(); ?></h1>
<?php while ( have_posts() ) : the_post(); ?>
<?php x_ethos_entry_meta(); ?>
<?php endwhile; ?>
</div>
</div>
</div>
<div class="x-container max width main">
<div class="offset cf">
<div class="<?php x_main_content_class(); ?>" role="main">
<?php while ( have_posts() ) : the_post(); ?>
<?php x_get_view( 'ethos', 'content', get_post_format() ); ?>
<?php x_get_view( 'global', '_comments-template' ); ?>
<?php endwhile; ?>
</div>
<?php if ( $fullwidth != 'on' ) : ?>
<?php get_sidebar(); ?>
<?php endif; ?>
</div>
</div>
<?php get_footer(); ?>
Step 5
Insert the following CSS into the Global CSS under Customise. To navigate here, go to Customise > Custom > Edit Global CSS
.entry-thumb {
  background-color:transparent;
}
.entry-featured {
  border:none;
}
.single-post .entry-featured {
display:none;
}
.single-post .entry-header .entry-title {
display:none;
}
.featured-image {
position: relative;
height: 500px;
background-size: cover;
background-attachment: fixed;
background-repeat: no-repeat;
background-position: center center;
}

@media (max-width: 736px) {
.featured-image {
background-attachment: initial;
background-position: center center;
}
.featured-image .caption{
bottom: 5% !important;
}
}

.featured-image:after {
content: "";
height: 100%;
width: 100%;
position: absolute;
display: block;
}

.featured-image:after {
bottom: 0;
background: rgba(96, 124, 138, 0.85);
}

.featured-image img {
width: 100% !important;
height: auto;
margin: auto;
}

.featured-image .caption {
position: absolute;
z-index: 999;
color: #fff !important;
bottom: 15%;
}

.featured-image .caption h1 {
color: rgba(255, 255, 255, 0.7) !important;
}

.entry-header .p-meta>span {
  display:none;
}
Icon
Step 3
Create the file wp-single.php under /public_html/wp-content/themes/x-child/framework/views/icon
Step 4
Insert the below code into the wp-single.php file you've just created.
<?php
// =============================================================================
// VIEWS/ICON/WP-SINGLE.PHP
// -----------------------------------------------------------------------------
// Single post output for Icon.
// =============================================================================
$fullwidth = get_post_meta( get_the_ID(), '_x_post_layout', true );
?>
<?php get_header(); ?>
<?php global $post; ?>
<div class="benryan featured-image bg-image parallax" style="background-image:url(<?php the_post_thumbnail_url(null); ?>) !important;" data-x-element="section" data-x-params="{"type":"image","parallax":true}";">
<div class="x-container max width">
<header class="entry-header">
<div class="caption">
<h1 class="entry-title"><?php the_title(); ?></h1>
</div>
</header>
</div>
</div>
<div class="x-main full" role="main">
<?php while ( have_posts() ) : the_post(); ?>
<?php x_get_view( 'icon', 'content', get_post_format() ); ?>
<?php x_get_view( 'global', '_comments-template' ); ?>
<?php endwhile; ?>
</div>
<?php if ( $fullwidth != 'on' ) : ?>
<?php get_sidebar(); ?>
<?php endif; ?>
<?php get_footer(); ?>
Step 5
Insert the following CSS into the Global CSS under Customise. To navigate here, go to Customise > Custom > Edit Global CSS
.entry-thumb {
  background-color:transparent;
}
.entry-featured {
  border:none;
}
.single-post .entry-featured {
display:none;
}
.single-post .entry-header .entry-title {
display:none;
}
.featured-image {
position: relative;
height: 500px;
background-size: cover;
background-attachment: fixed;
background-repeat: no-repeat;
background-position: center center;
}

@media (max-width: 736px) {
.featured-image {
background-attachment: initial;
background-position: center center;
}
.featured-image .caption{
bottom: 5% !important;
}
}

.featured-image:after {
content: "";
height: 100%;
width: 100%;
position: absolute;
display: block;
}

.featured-image:after {
bottom: 0;
background: rgba(96, 124, 138, 0.85);
}

.featured-image img {
width: 100% !important;
height: auto;
margin: auto;
}

.featured-image .caption {
position: absolute;
z-index: 999;
color: #fff !important;
bottom: 15%;
}

.featured-image .caption h1 {
color: rgba(255, 255, 255, 0.7) !important;
}
Icon Pro
Step 3
Create the file wp-single.php under /public_html/wp-content/themes/pro-child/framework/views/icon
Step 4
Insert the below code into the wp-single.php file you've just created.
<?php
// =============================================================================
// VIEWS/ICON/WP-SINGLE.PHP
// -----------------------------------------------------------------------------
// Single post output for Icon.
// =============================================================================
$fullwidth = get_post_meta( get_the_ID(), '_x_post_layout', true );
?>
<?php get_header(); ?>
<?php global $post; ?>
<div class="benryan featured-image bg-image parallax" style="background-image:url(<?php the_post_thumbnail_url(null); ?>) !important;" data-x-element="section" data-x-params="{"type":"image","parallax":true}";">
<div class="x-container max width">
<header class="entry-header">
<div class="caption">
<h1 class="entry-title"><?php the_title(); ?></h1>
</div>
</header>
</div>
</div>
<div class="x-main full" role="main">
<?php while ( have_posts() ) : the_post(); ?>
<?php x_get_view( 'icon', 'content', get_post_format() ); ?>
<?php x_get_view( 'global', '_comments-template' ); ?>
<?php endwhile; ?>
</div>
<?php if ( $fullwidth != 'on' ) : ?>
<?php get_sidebar(); ?>
<?php endif; ?>
<?php get_footer(); ?>
Step 5
Insert the following CSS into the Global CSS under Customise. To navigate here, go to Customise > Custom > Edit Global CSS
.entry-thumb {
  background-color:transparent;
}
.entry-featured {
  border:none;
}
.single-post .entry-featured {
display:none;
}
.single-post .entry-header .entry-title {
display:none;
}
.featured-image {
position: relative;
height: 500px;
background-size: cover;
background-attachment: fixed;
background-repeat: no-repeat;
background-position: center center;
}

@media (max-width: 736px) {
.featured-image {
background-attachment: initial;
background-position: center center;
}
.featured-image .caption{
bottom: 5% !important;
}
}

.featured-image:after {
content: "";
height: 100%;
width: 100%;
position: absolute;
display: block;
}

.featured-image:after {
bottom: 0;
background: rgba(96, 124, 138, 0.85);
}

.featured-image img {
width: 100% !important;
height: auto;
margin: auto;
}

.featured-image .caption {
position: absolute;
z-index: 999;
color: #fff !important;
bottom: 15%;
}

.featured-image .caption h1 {
color: rgba(255, 255, 255, 0.7) !important;
}
And your all done 🙂 Hope you enjoy and feel free to share a link to show me the full width parallax featured image in action.
I use Featured Images with a dimension of 1440×900 and .jpg format. If you need to shrink the file size of that file to preserve your Speed Optimisation, I would recommend TinyPNG.